|
|
Post by drtsqrl on Feb 12, 2008 19:01:48 GMT -5
I can work on it Wednesday evening if you get your parts. Thursday and Friday aren't so good, and Saturday is the Red Hot marathon, but hopefully we can get the front end together on Sunday. One or two more good days and you can drive it outta here!
|
|
PJTPW
New Member

Posts: 21
|
Post by PJTPW on Mar 1, 2008 0:56:13 GMT -5
I got you steering arm drilled and tapered today  Jeff and I had to do a little "rearranging" on the steering today. We were having a slight problem with everything interfering with everything when the suspension was cycled, so now it's all upside down and backwards. You'll see tomorrow. ;D Ryan |
|
|
|
Post by greenjeep on Mar 1, 2008 18:34:36 GMT -5
I've always been upside down and backwards, my Jeep might as well match!!
|
|
timb
Junior Member
 
Posts: 53
|
Post by timb on Mar 2, 2008 13:54:12 GMT -5
My 95 YJ has coils in the front, and moved the axle forward 8". I used a 88 ford F150 gearbox on the steering for it - the pitman arm goes towards the front on them.
edited because I can't spell
|
|
|
|
Post by greenjeep on Mar 3, 2008 20:11:20 GMT -5
So, after waiting for parts for the last little while we finally received the rest of the stuff we need, and we were able to get together to get things worked on. Jeff has spent some time getting some finishing touches done. Here is the front axle completely installed and painted 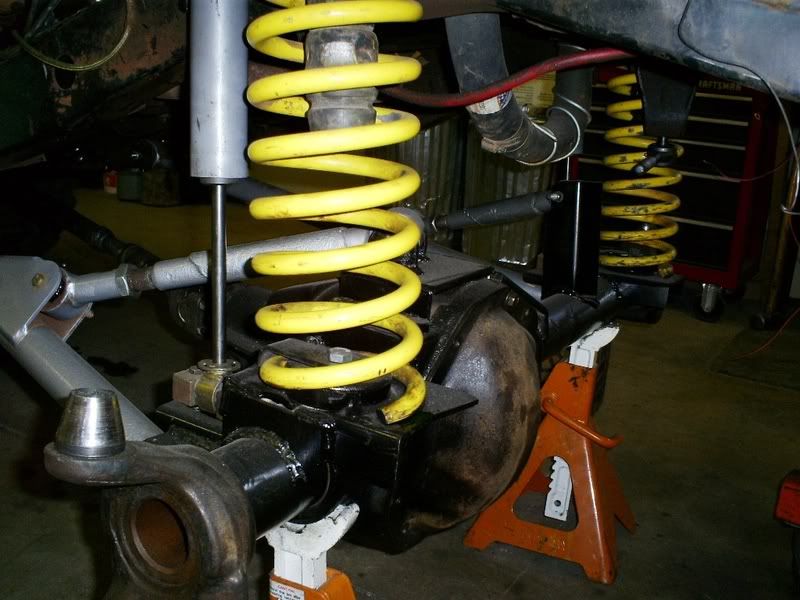 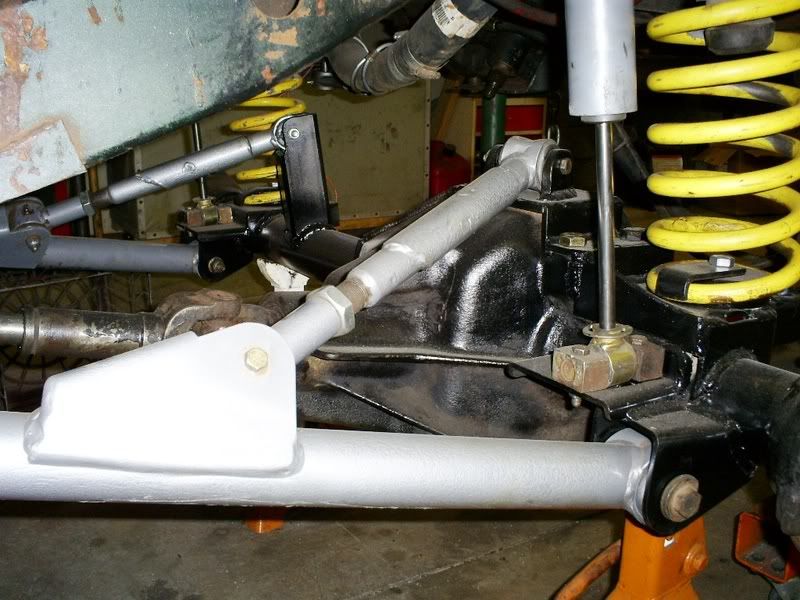 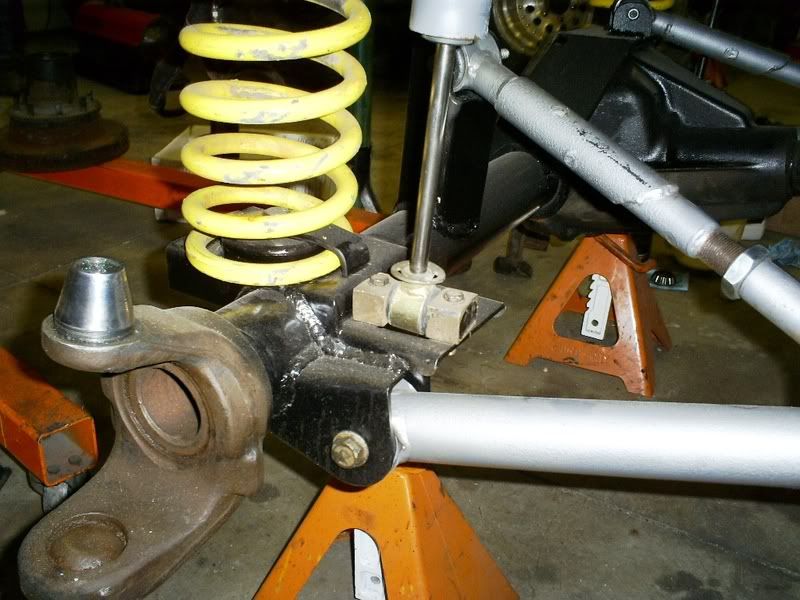 You can see from these pictures, we haven't been able to reinstall the knuckles yet because we were waiting on a couple seals and bushings for the kingpins. We decided not to do a complete kingpin rebuild because most of the stuff look like it was in pretty good shape, plus it was way cheaper to just get the parts we needed. After waiting for over a week to get the kingpin parts and high steer arms, we could finally install the knuckles. 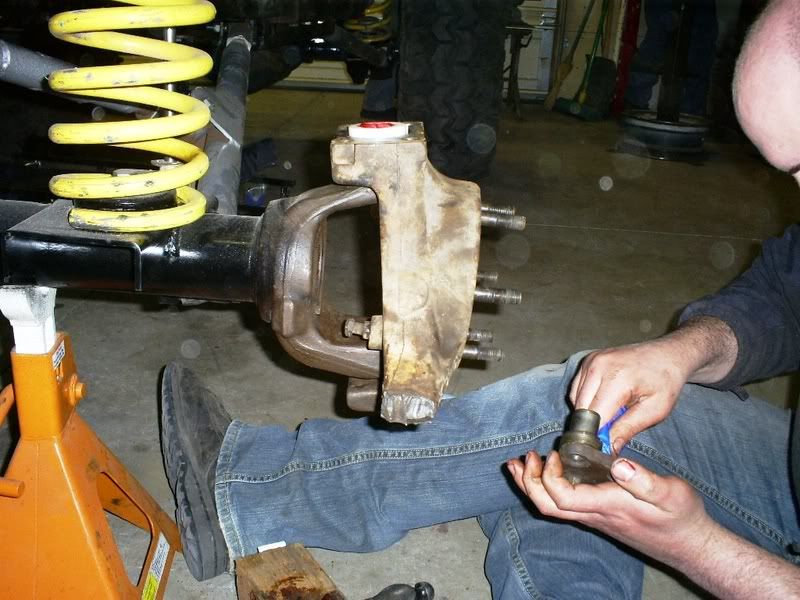 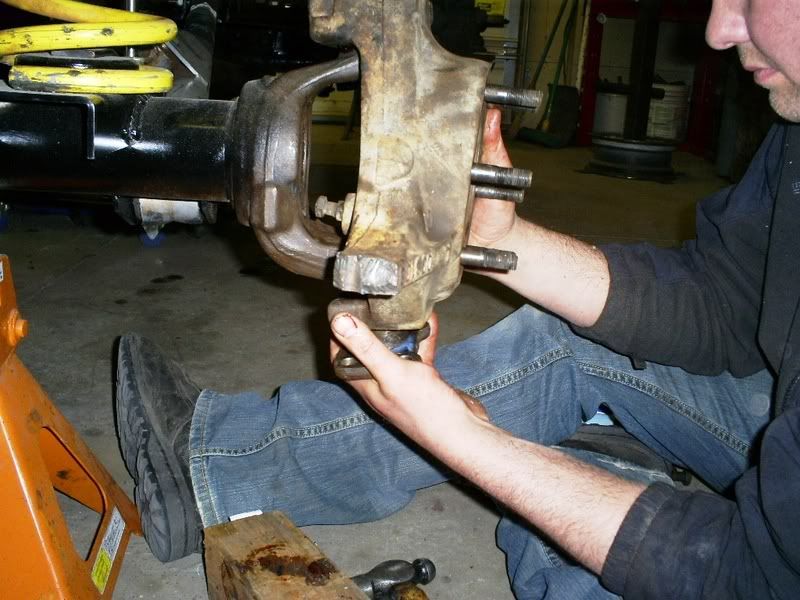 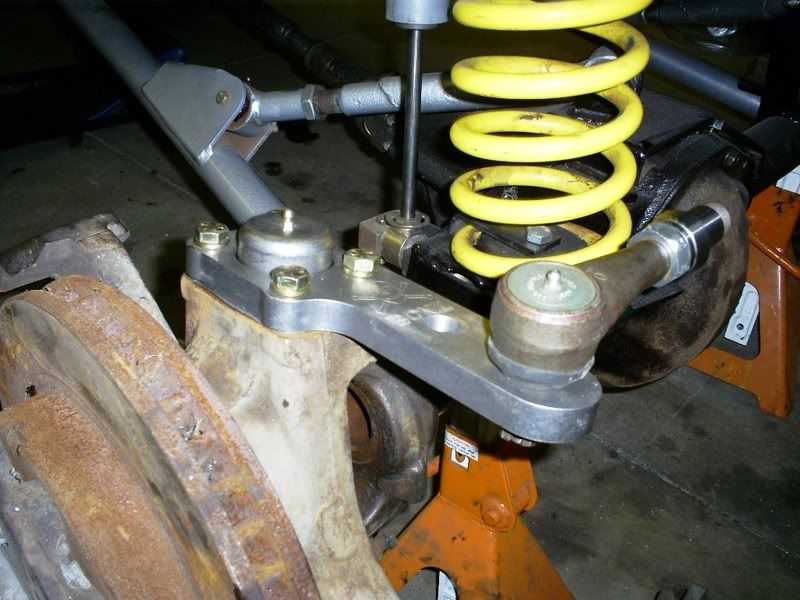 After getting the arms installed, we realized we had made a miscalculation in the placement of the drag link and tie rod holes. We had planned on having the drag link come into the front of the arm, with the tie rod right behind it. However, with the coil installed we quickly realized that the tie rod wasn't going to fit, and we were going to have come up with something else. You can see the clearance problem from this angle, which is taken with the wheels facing straight forward, as I turn the tie rod would've gone right into the coil spring. 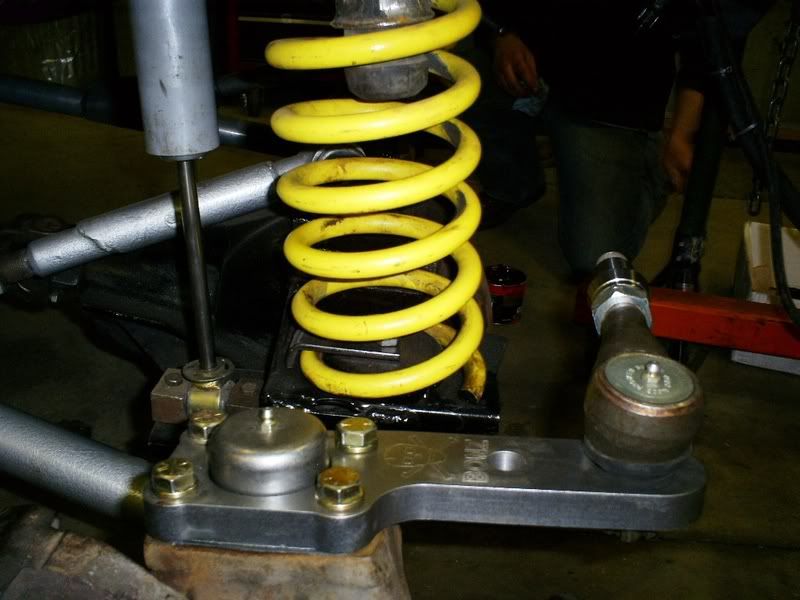 So here's our solution 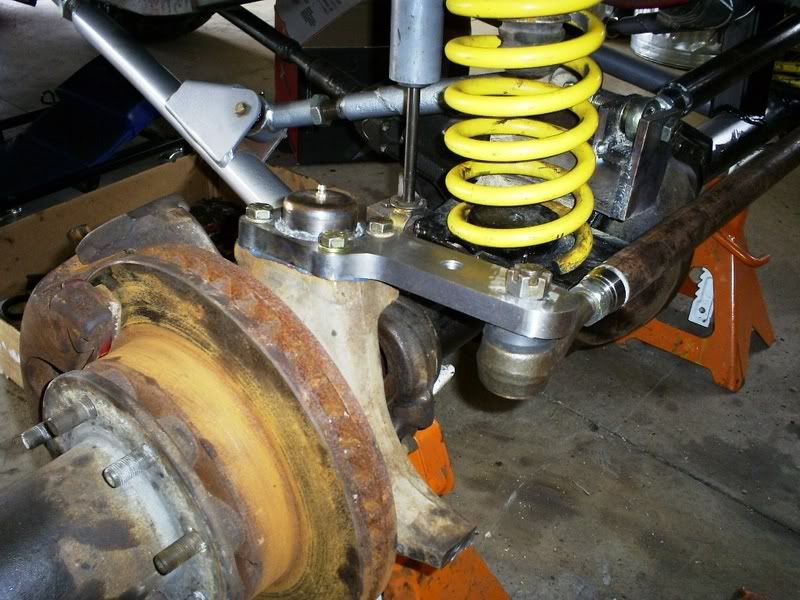 Trust me though, it wasn't as easy as it looks. We had planned on using drag link ends for the drag link, because they have more flex to them, and tie rod ends for the tie rod, and we reamed the holes in the arms accordingly. Obviously, the driver side didn't have a drag link hole in it, so we had to drill a hole and ream it. We also found that with the tie rod on top of the arms we ran into clearance issues with both the wheels, frame and the pitman arm. So we had to swap the arms and attach the tie rod coming up from the bottom. 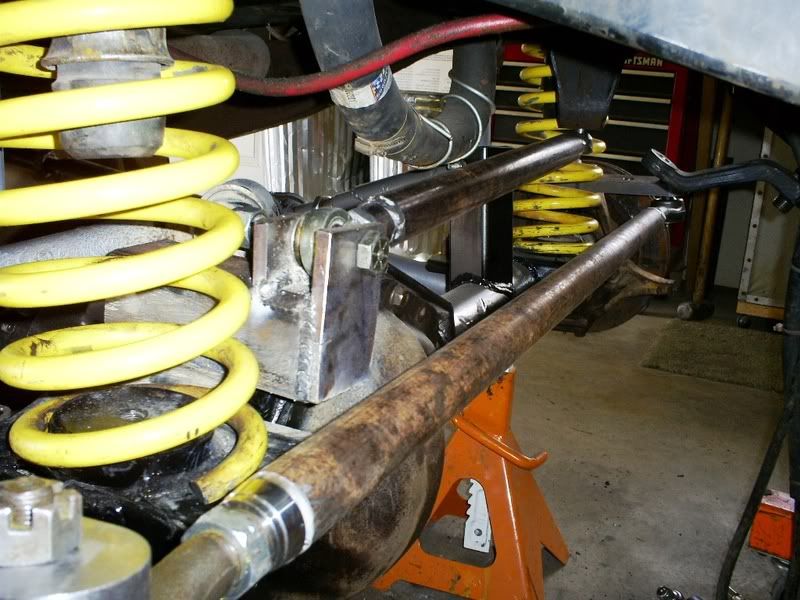 Also, on the bottom of the high steer arms they are reamed out to go over the kingpin cap, so rather than re-ream them we just cut off the bottom and welded the caps to the arm. 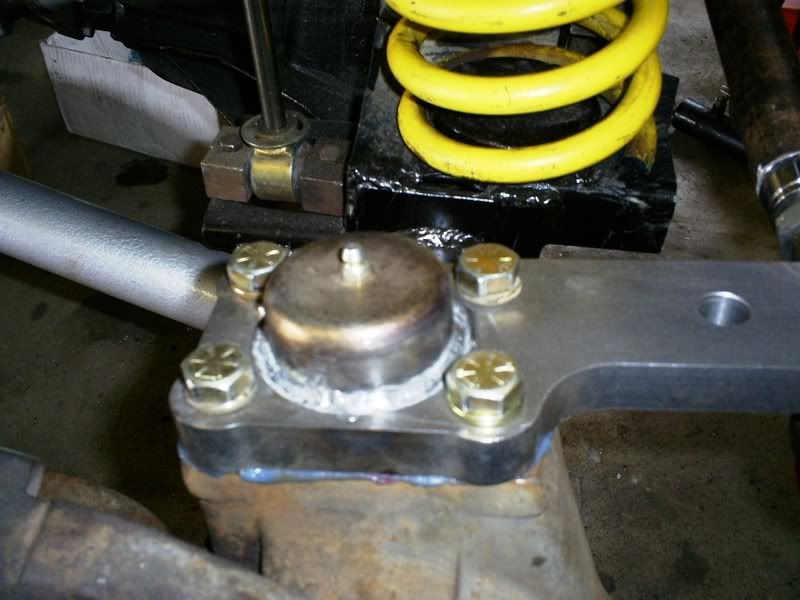 This is how we envision the arms and links attacking, with the drag link on the drag link, and the tie rod ends on the tie rod. 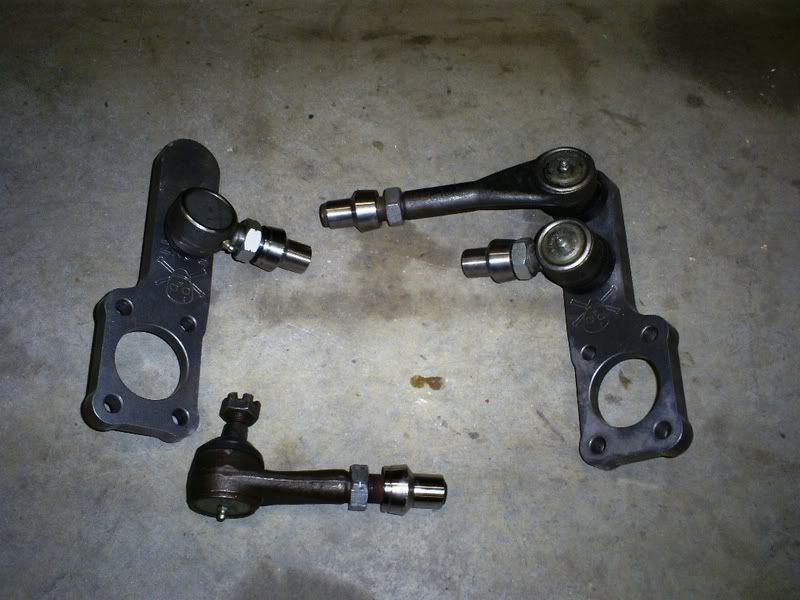 But because of how the arms were already reamed we had to switch them and put the drag link and on the tie rod, and the tie rod ends on the drag link. But it all seems to work okay, so I guess we'll go with it! Here is the tie rod and track bar attached. 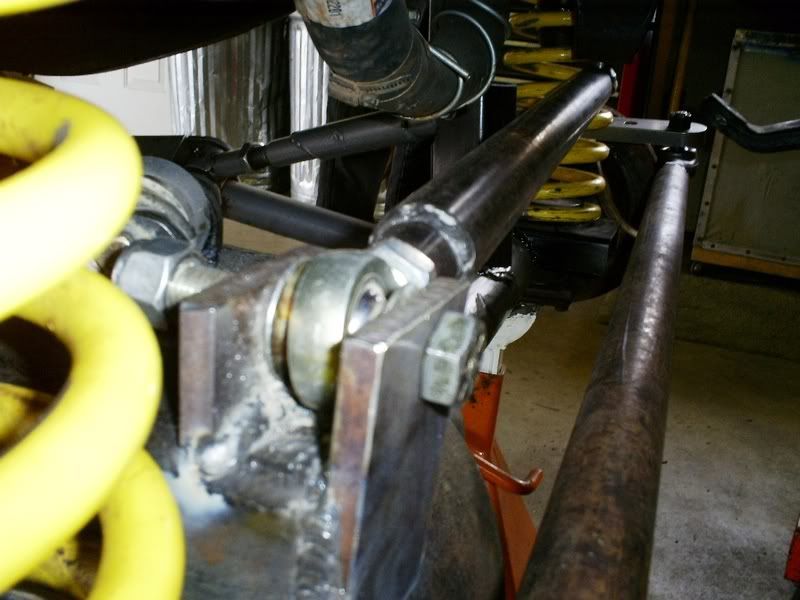 Here we have removed the front coils, and dropped the body all the way to the bump stops, you can see there's not a lot of room under there at full compression, just barely enough so that everything misses each other. 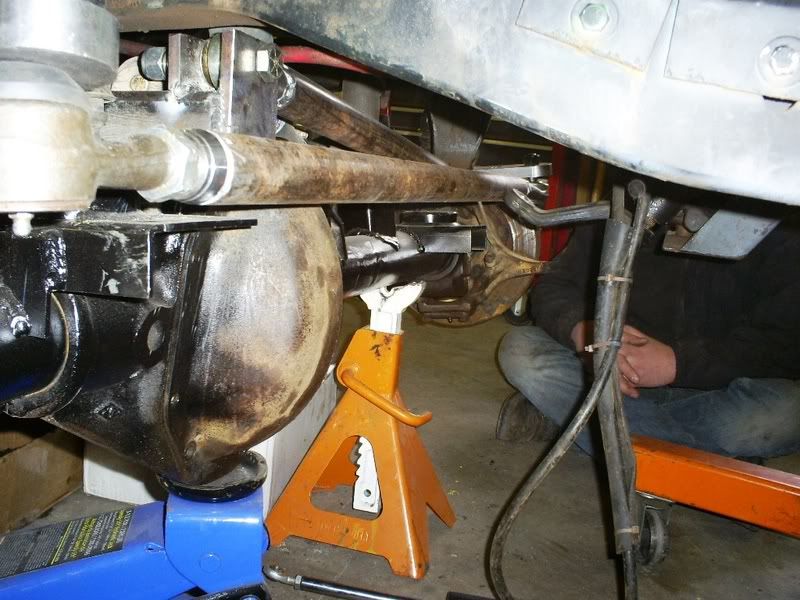 And here it is flexed out again with the driver's all the way up, you can see, it just barely clears the pitman arm. 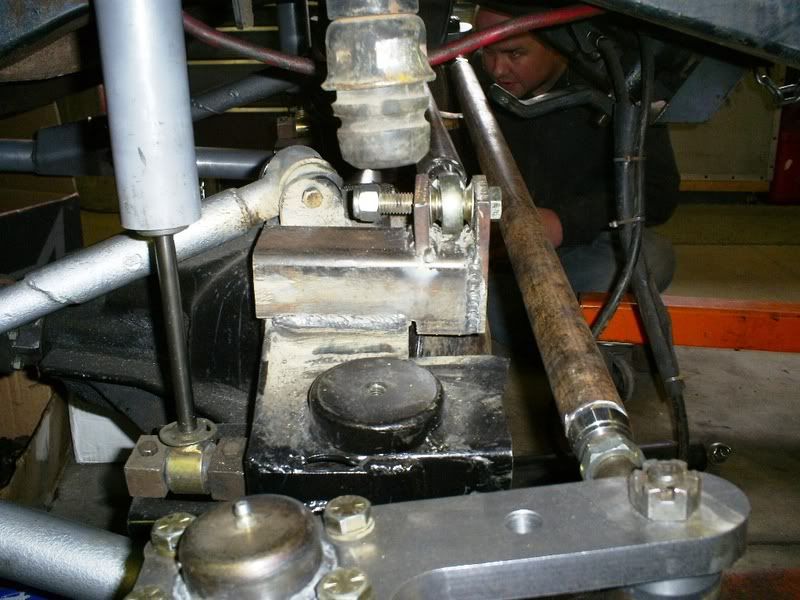 This is how we came up with the best way to attach a drag link, welding a bracket to the tie rod and attaching it there. Here it is, tacked in place to get final measurements for the drag link. 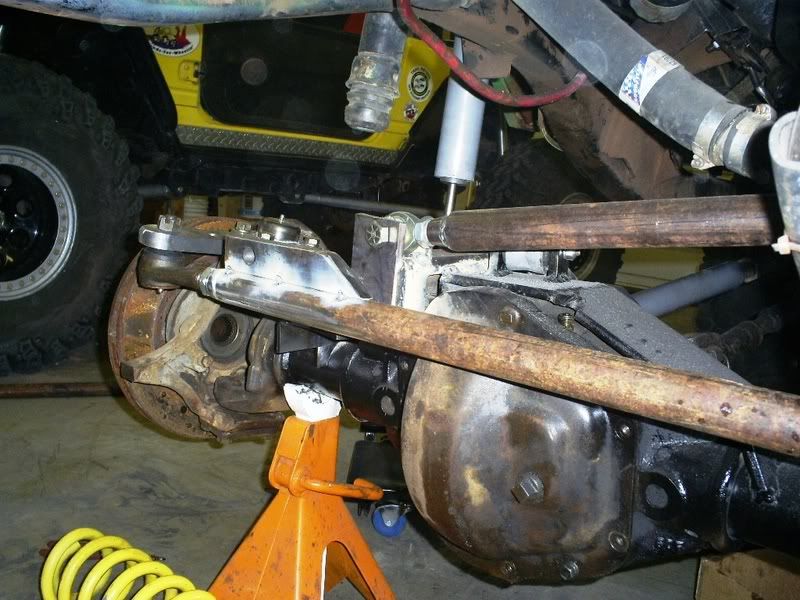 And the final welding 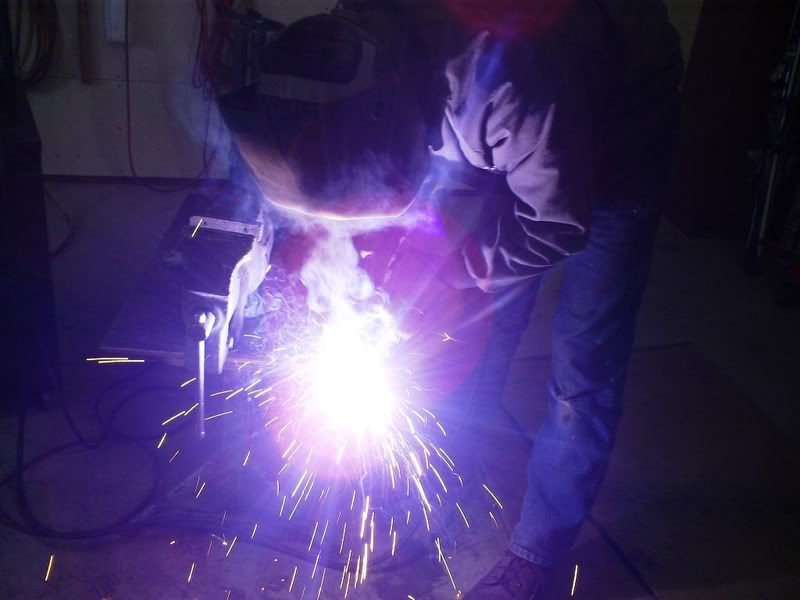 |
|
|
|
Post by greenjeep on Mar 3, 2008 20:38:02 GMT -5
While waiting for the above-mentioned parts, Jeff cut down the studs on the Humvee wheels to try to prevent them from getting bent or broken off by rocks. We double checked, and there's still plenty of room to get the nuts started when bolting together the two halves. 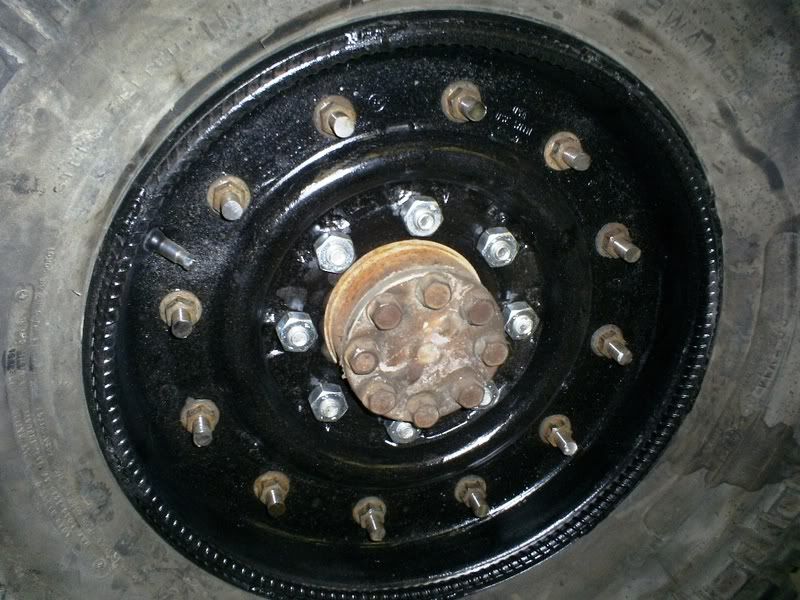 He also figured out the fuel filler hose problem 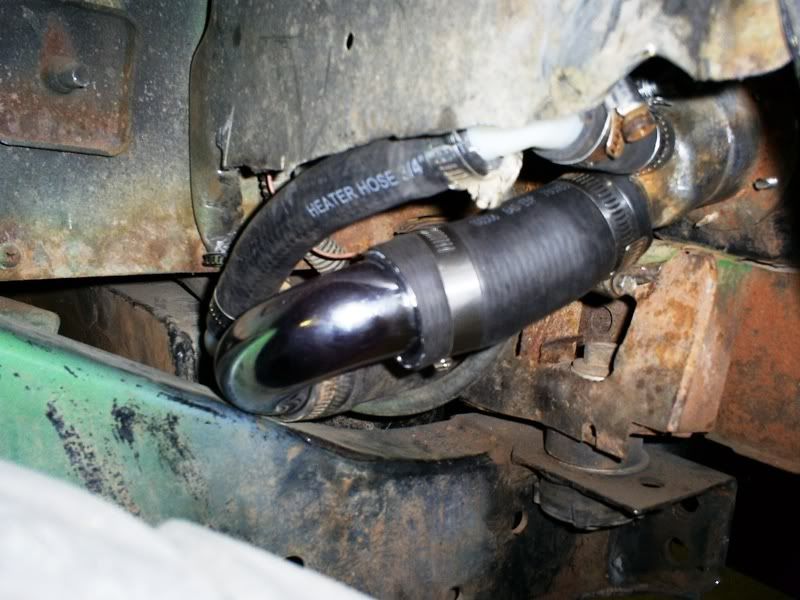 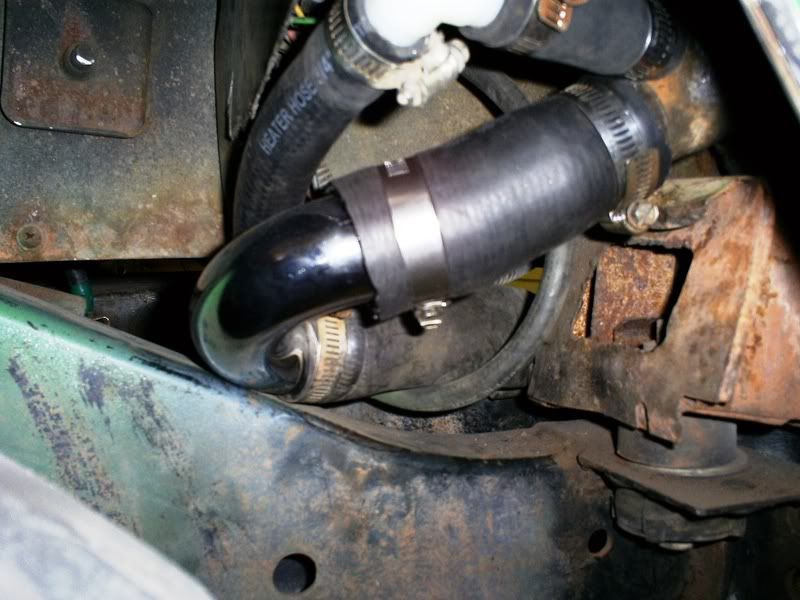 Yes, that is a chrome P. trap, just like what's under your sink at home! I also had to grind down the break caliper in order to get a little bit better fit for the wheels 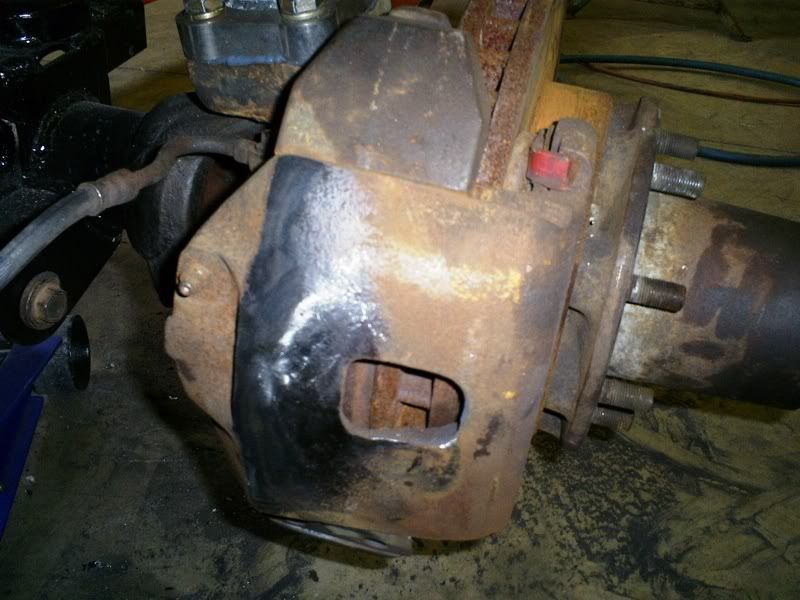 On the left in this picture you can see the combo u-joint that we needed to connect my Dana 44 size driveshaft yoke to the 14 bolt yoke. The picture doesn't do a much justice, but they really are weird looking in real life. On the right is the Dana 60 axel joint (806x). 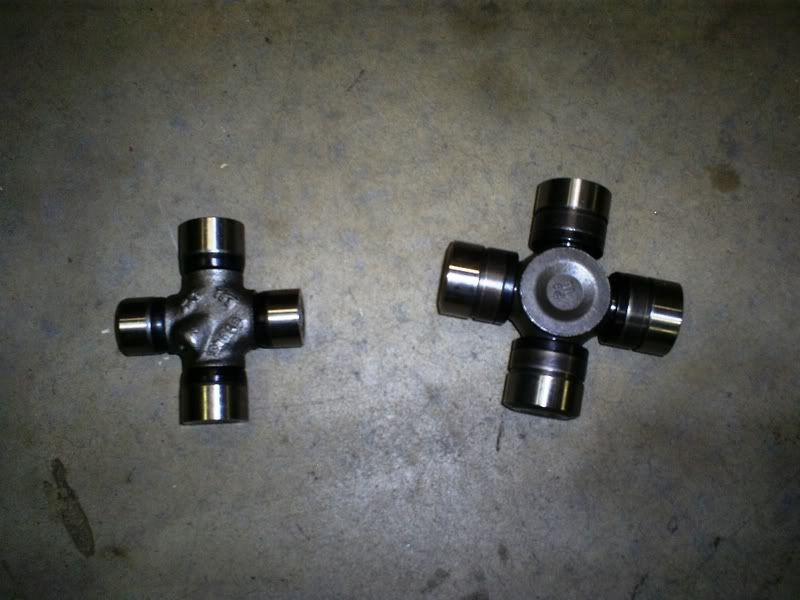 Here is the joint with the new 35 spline chrome moly stub shaft 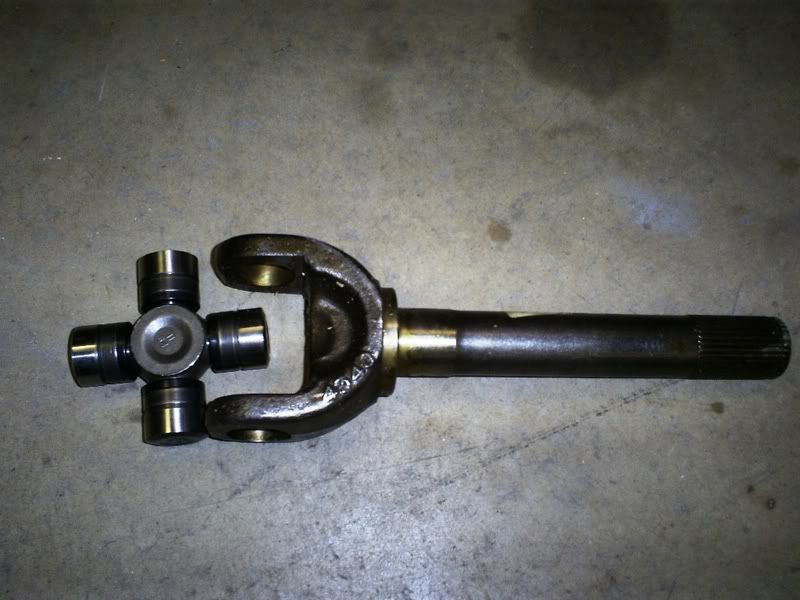 Ryan (PJTPW) began working on installing my TBI kit, here it is bolted to the intake manifold 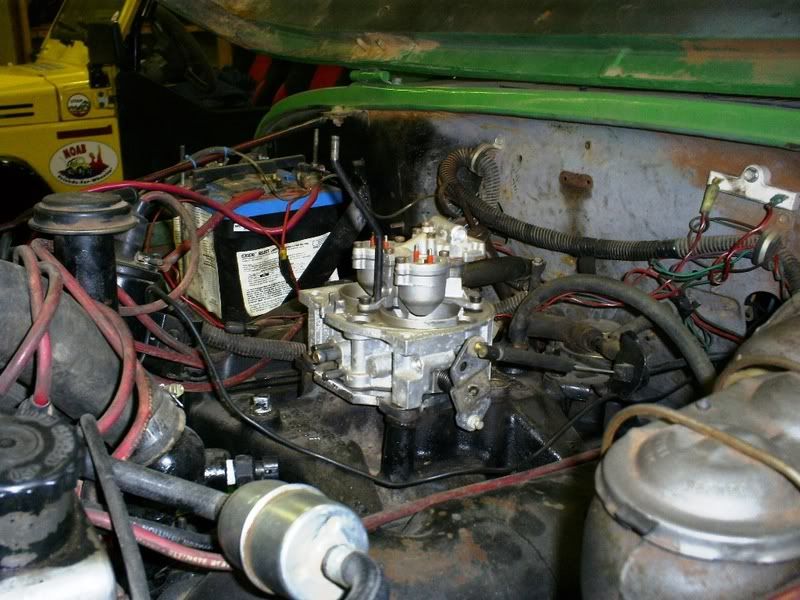 Here he is, trying to figure out where all the wiring goes 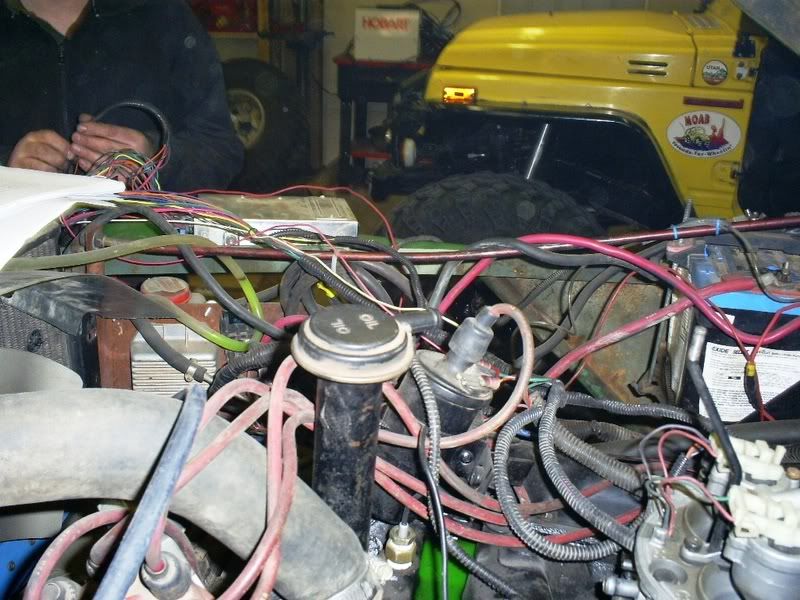 And this is him being frustrated at the instructions because they don't tell which wire is what color. Don't worry, I have faith that he'll be able to figure it out. . . hopefully. ;D ;D 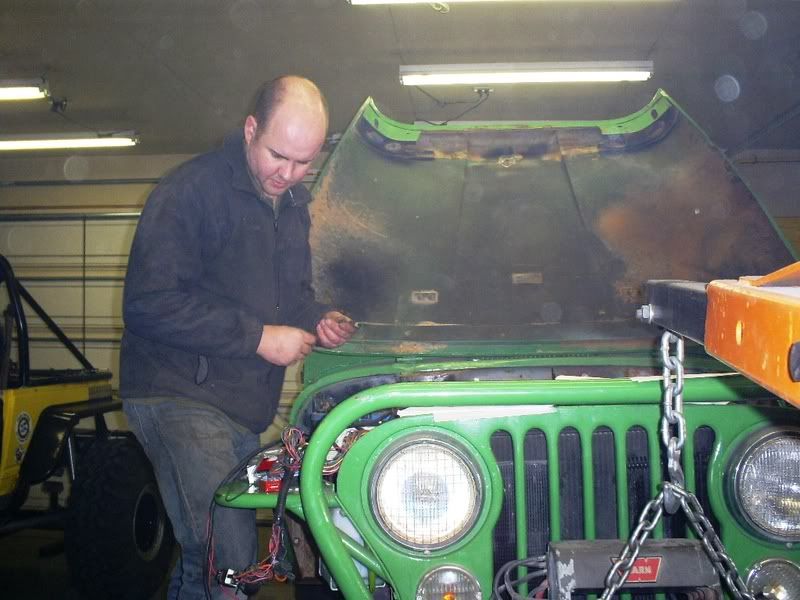 We are getting really close, hopefully only another couple of days and we'll be driving it out at Jeff's garage. The last thing will be getting the ring and pinion and locker installed, which I very have lined up to do. More in a couple days, and hopefully this write up will be done!!! |
|
timb
Junior Member
 
Posts: 53
|
Post by timb on Mar 4, 2008 16:22:15 GMT -5
My 95 YJ has coils in the front, and moved the axle forward 8". I used a 88 ford F150 gearbox on the steering for it - the pitman arm goes towards the front on them. edited because I can't spell I posted that because it helped solve rod interference I had. Here's a couple of pics. Just something to consider if you need it.   It's a big box, I had to cut the grill some. And built a shorter drag link for it as well. It drives pretty good. Takes a lot more input from the steering wheel to turn it now though - I'm not sure what the turns are from lock to lock but it's quite a bit more. Don't take much effort to turn 40" bias tires though.   |
|
|
|
Post by greenjeep on Mar 5, 2008 9:49:47 GMT -5
Thanks Tim. Yours definitely came out nice! The fog sure makes it look all eerie.
We just ported my box for hydro-assist last summer, so I hope to not have to replace it any time soon, but your idea is a good one and I can see the advantage to it.
|
|
timb
Junior Member
 
Posts: 53
|
Post by timb on Mar 5, 2008 15:37:26 GMT -5
It's still got a lot of loose ends - I got it far enough for the kids to drive it a week in Colorado, then the funds ran low. I'll get back to it some day I'm sure. Don't look for me in that this year - I'm still in the white one.  |
|
bart
New Member

Posts: 11
|
Post by bart on Mar 6, 2008 10:56:16 GMT -5
Looks good Dave. Good luck .
|
|
PJTPW
New Member

Posts: 21
|
Post by PJTPW on Mar 7, 2008 2:40:48 GMT -5
Fuel injection is finished, replumbed, and good to go. Dave drove the Jeep home tonight. I also figured out how to fix your incorrect pedal ratio. (It's quick and dirty, but works) We just need to put a tab extending off the pedal and extend a rigid length from the m/c pushrod to the new tab. Here's a quick drawling I did. Not to scale, just a quick mock up. I think we can pick up about 40% more travel for the pushrod. I should be sleeping not doing this. ;D I think we have the brakes figured out too.  Ryan  |
|
|
|
Post by greenjeep on Mar 7, 2008 13:50:32 GMT -5
Dave drove the Jeep home tonight. . . . and there was much rejoicing          !!!!!!!!!!!!!!!!!!!!!!!!!!!!!! Jeff and Ryan are the GREATEST GUYS EVER!!!!!!!!!!!!!I also figured out how to fix your incorrect pedal ratio. (It's quick and dirty, but works) We just need to put a tab extending off the pedal and extend a rigid length from the m/c pushrod to the new tab. Here's a quick drawling I did. Not to scale, just a quick mock up. I think we can pick up about 40% more travel for the pushrod. I should be sleeping not doing this. ;D I think we have the brakes figured out too.  Ryan  Sounds great. Roy hopes to be done with it by early next week. Hopefully we can extend the push rod then. I'm also having him look at the brakes and see what can be done. |
|
bart
New Member

Posts: 11
|
Post by bart on Mar 10, 2008 14:47:23 GMT -5
Too cool, congrats to all. That's a great feeling to finally drive a rig after a conversion like that. Can't wait to see it.
|
|
|
|
Post by greenjeep on Mar 13, 2008 10:30:49 GMT -5
Well as you know it's done (except for the ring and pinion install which should be happening today), but here's how we arrived at that point. The completed steering with the coils out and sitting on the bump stops 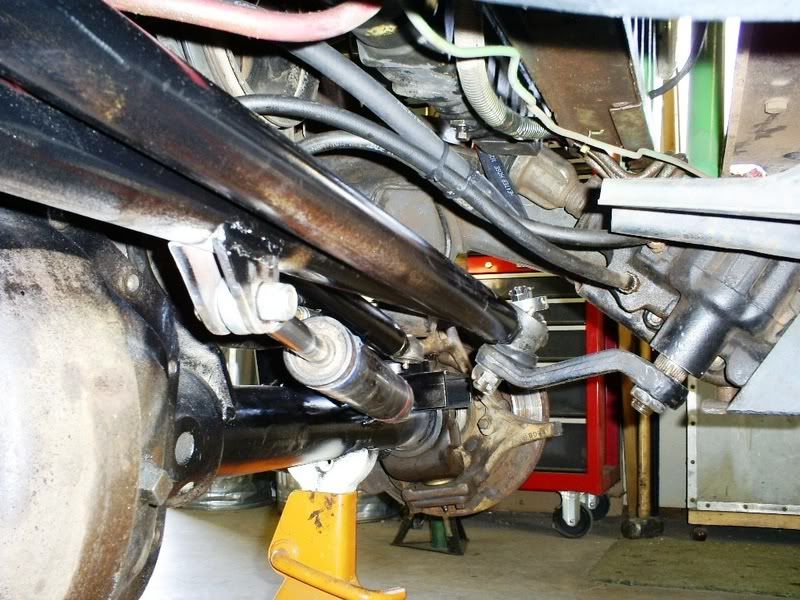 It's REALLY tight! 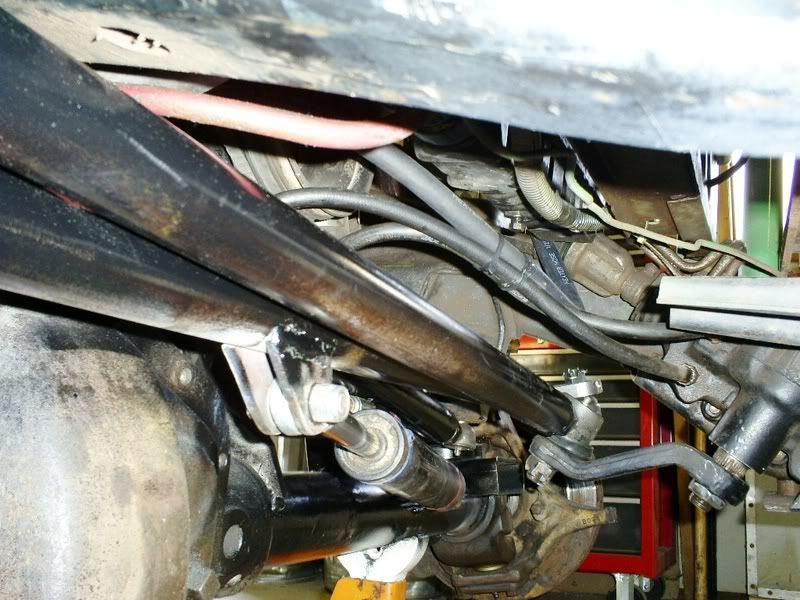 This is ride height 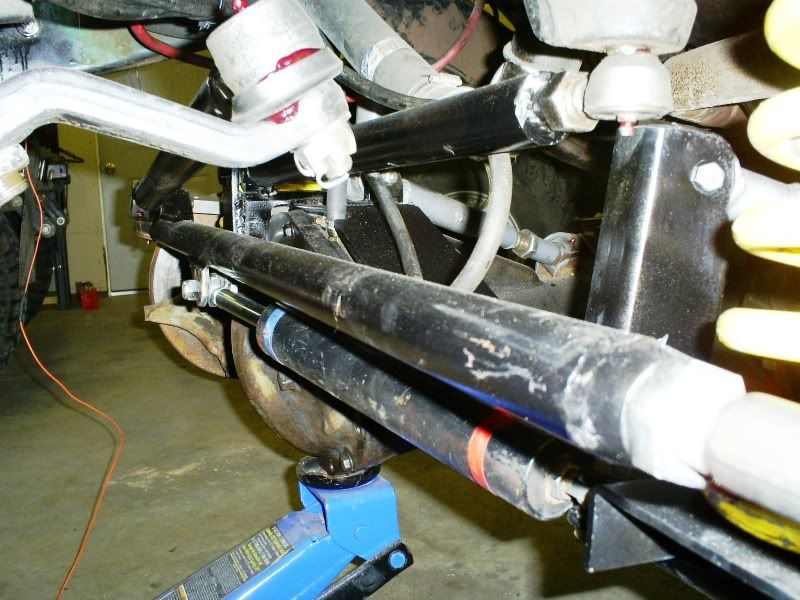 We even had to grind down the nut coming of the pitman arm so it would clear the tie rod. 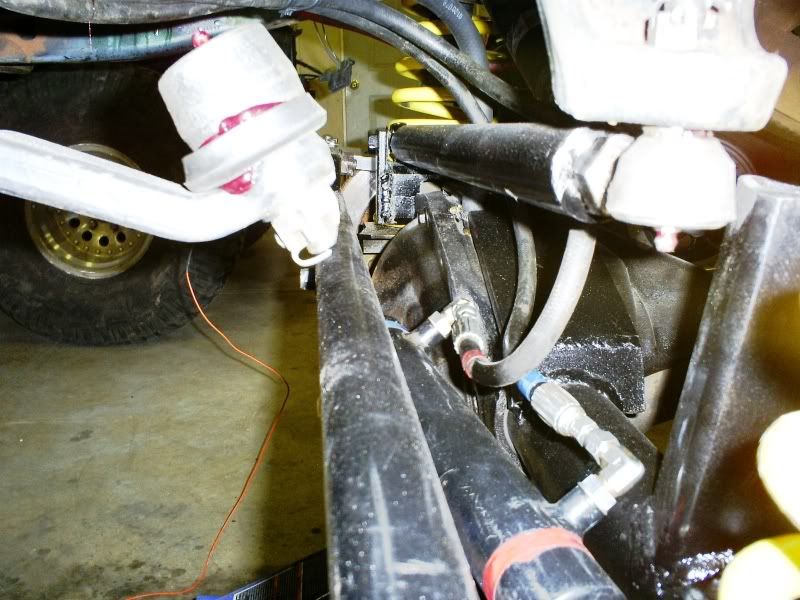 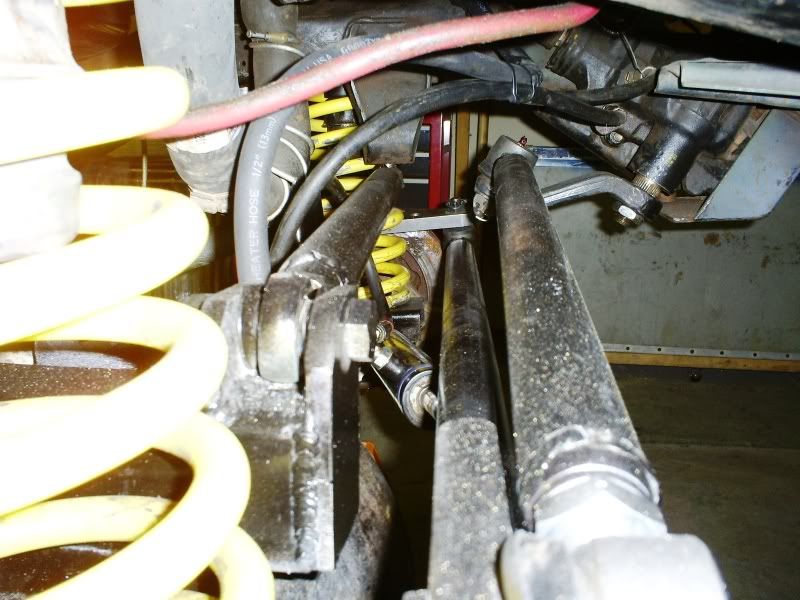 Here it is fully extended 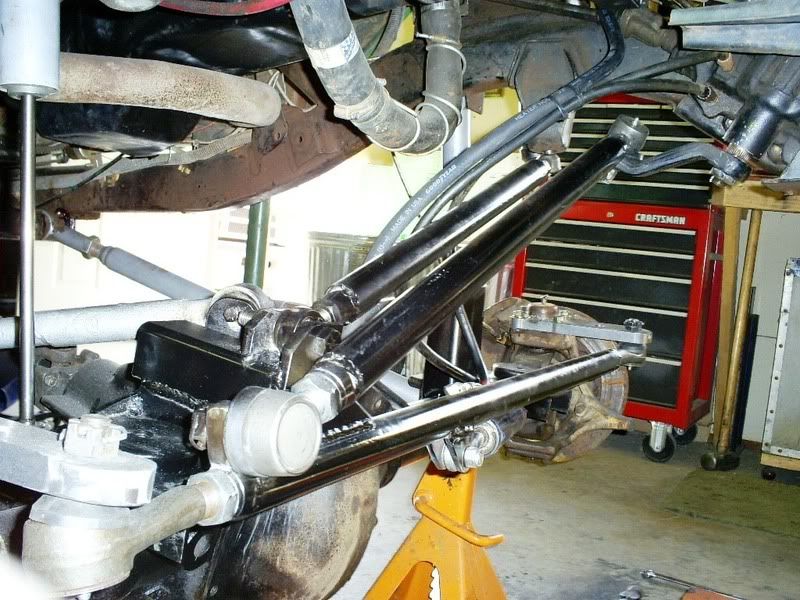 Sitting on it's own weight! 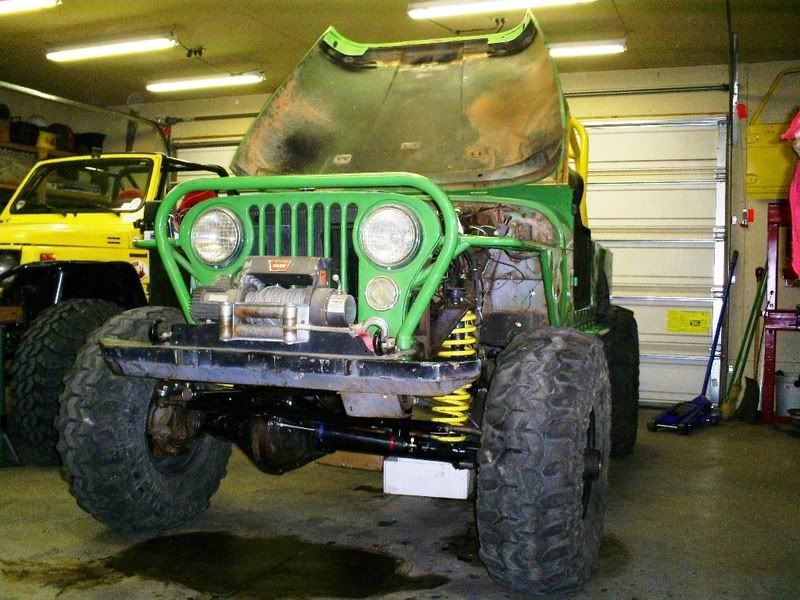 Close ups of completed front end 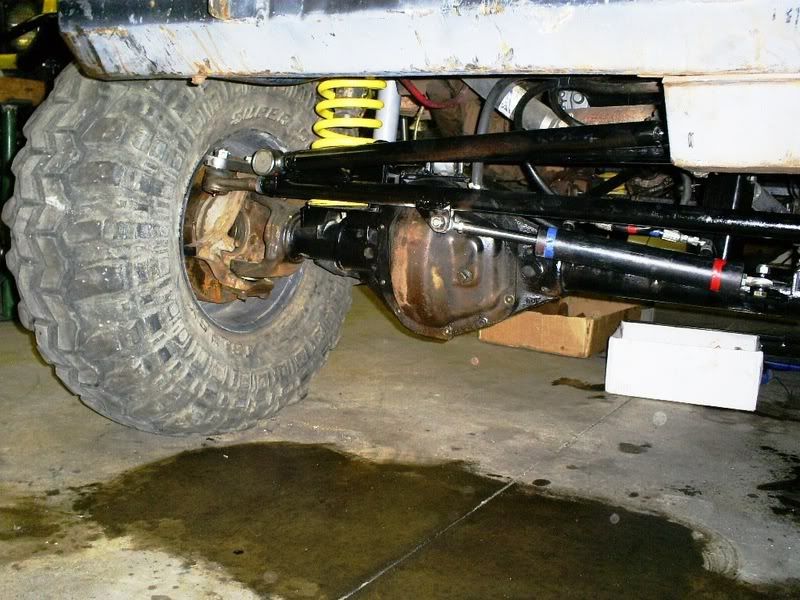 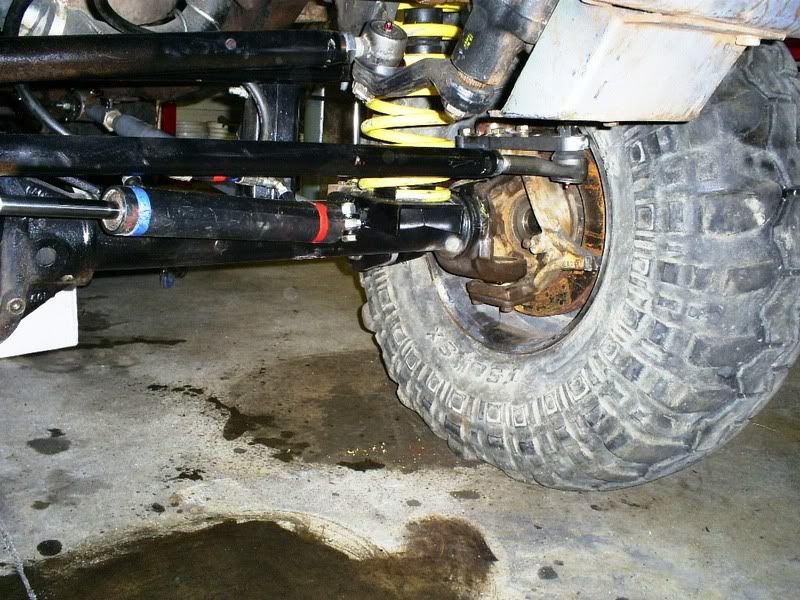 Hydro assist ram mounted, we'll build a little skid plate for it later 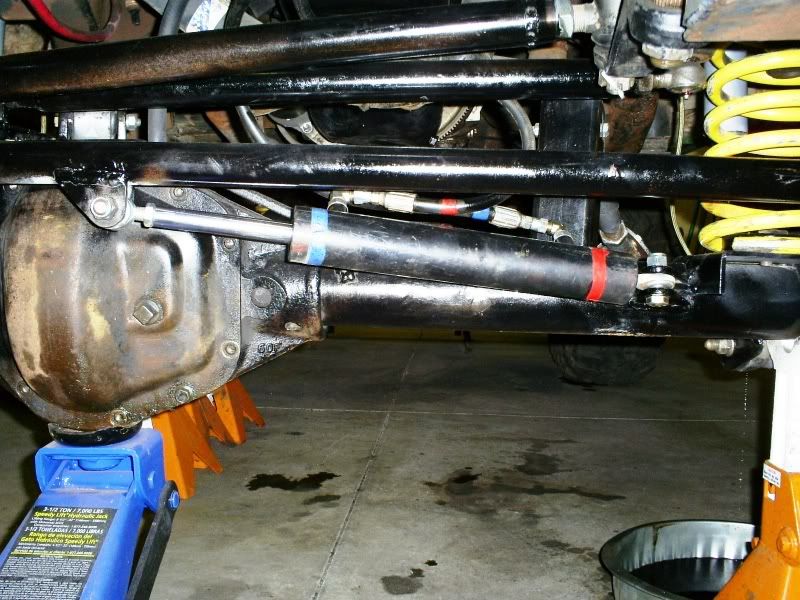 Steering clearance, not a lot, but enough 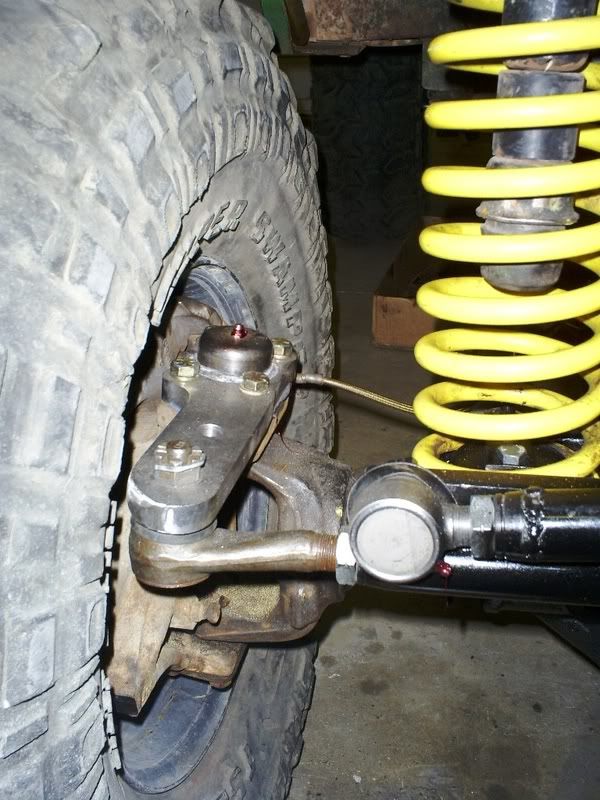 Close up of the drag link attaching to the tie rod 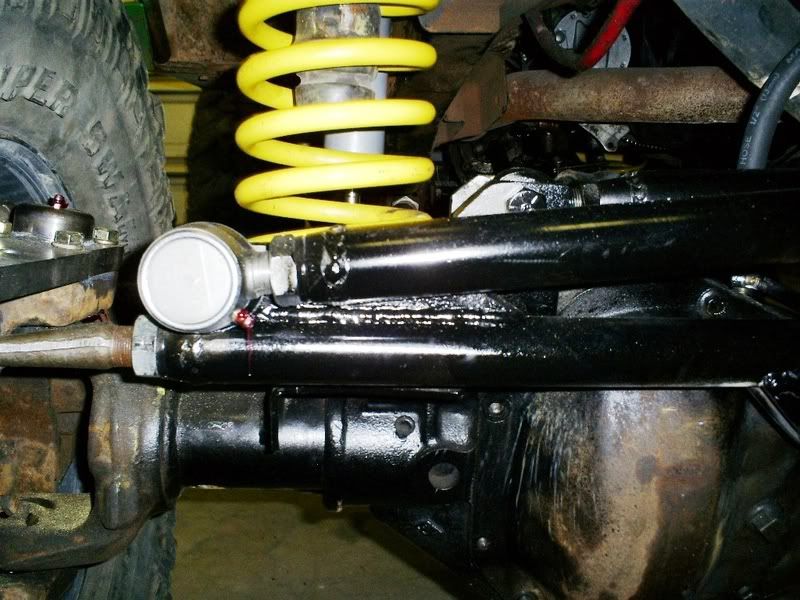 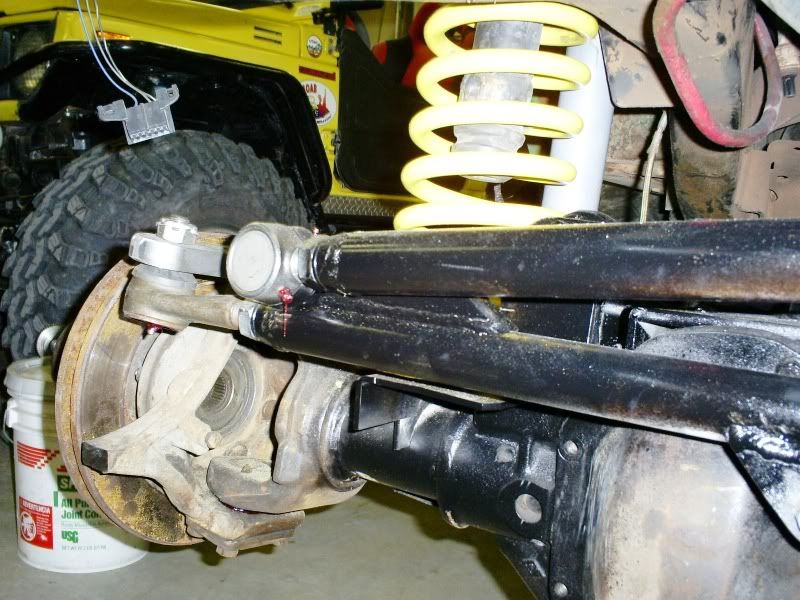 Back of the front axle 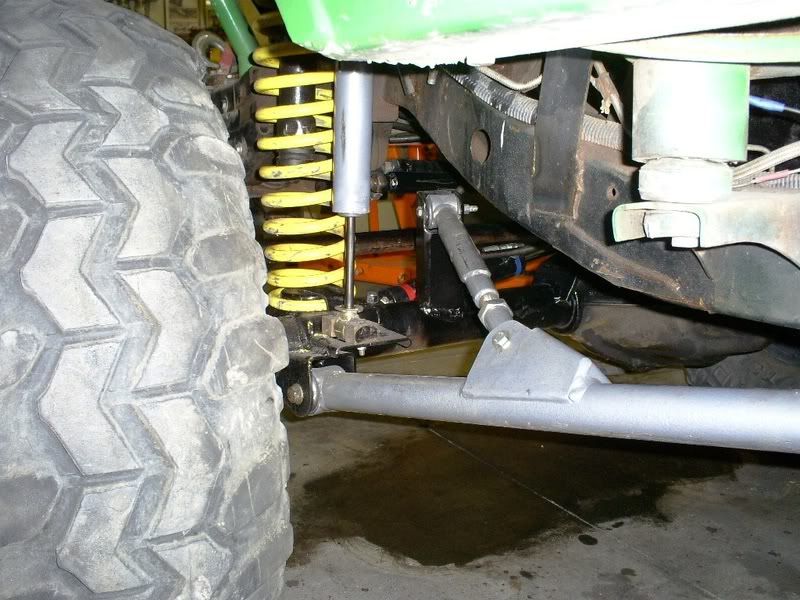 We ran into some problems on the 14 bolt yoke, for some weird reason there wasn't enough room to be able to get the nuts on the u-joint u-bolts. So Jeff broke out a die grinder and made room! 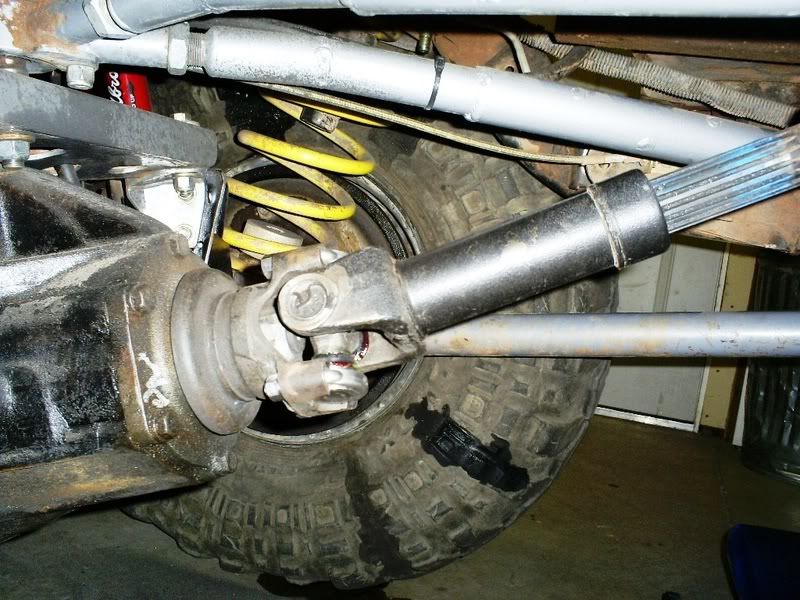 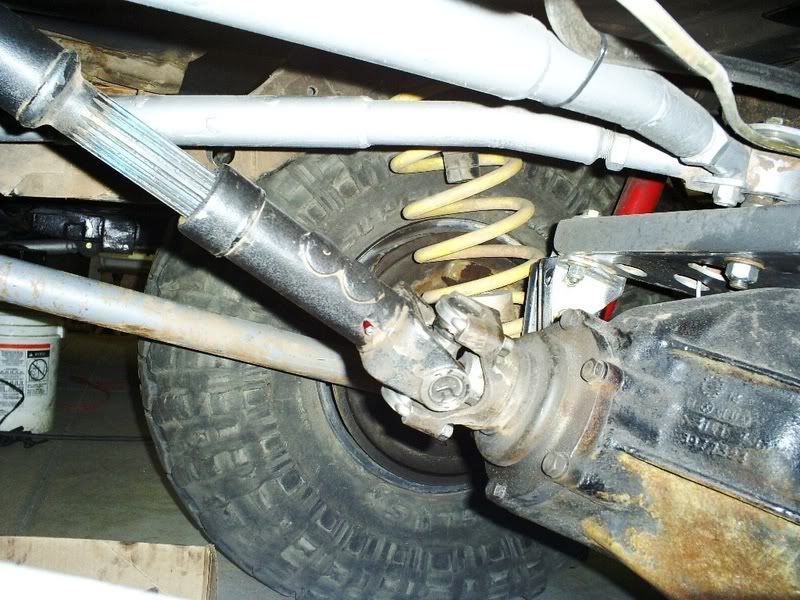 |
|
|
|
Post by greenjeep on Mar 13, 2008 11:48:19 GMT -5
With 7" backspacing, I was a little worried about how exposed the hub would be. With 14.50" wide tires, it's not too bad. 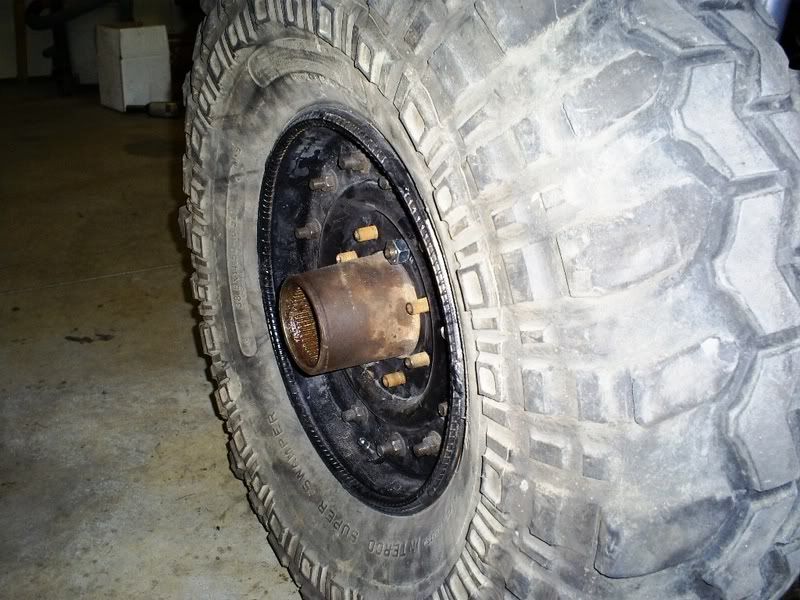 From the front 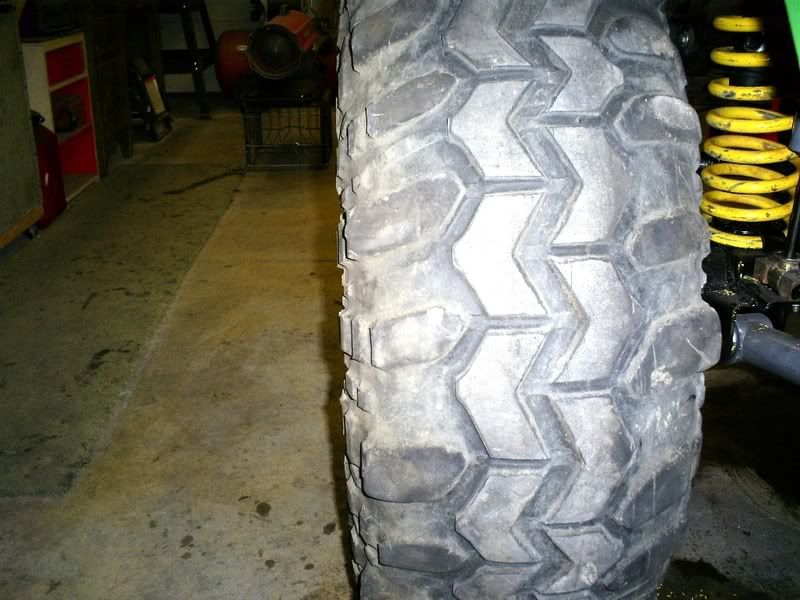 These are the Spicer brand drive flanges I ordered from Randy's Ring & Pinion. I'm not impressed with the quality of the stamped cap so I'm returning them and getting some with a bolt on cap from the Moab 4X4 Outpost 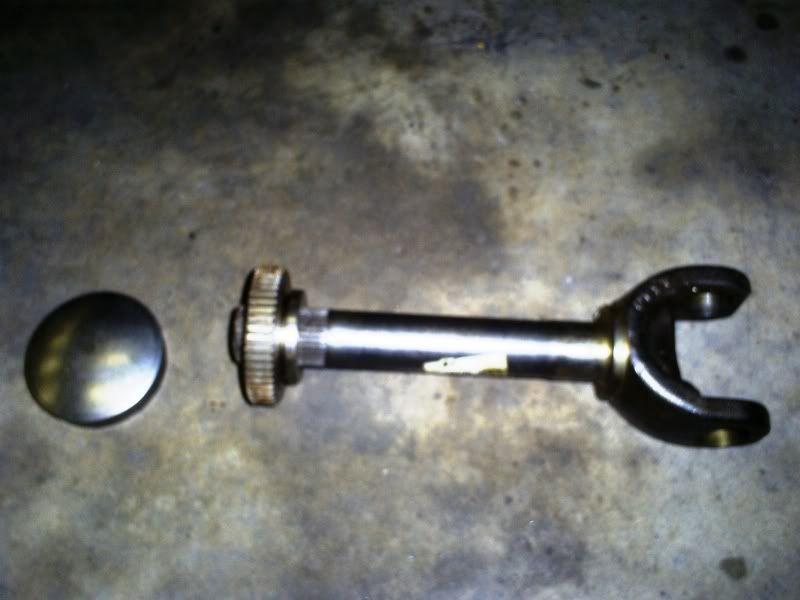 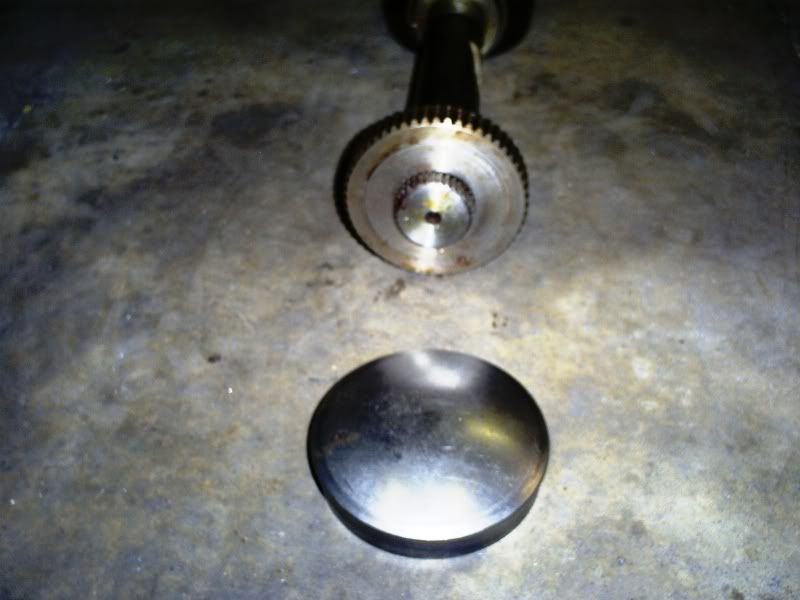 The flange in the hub 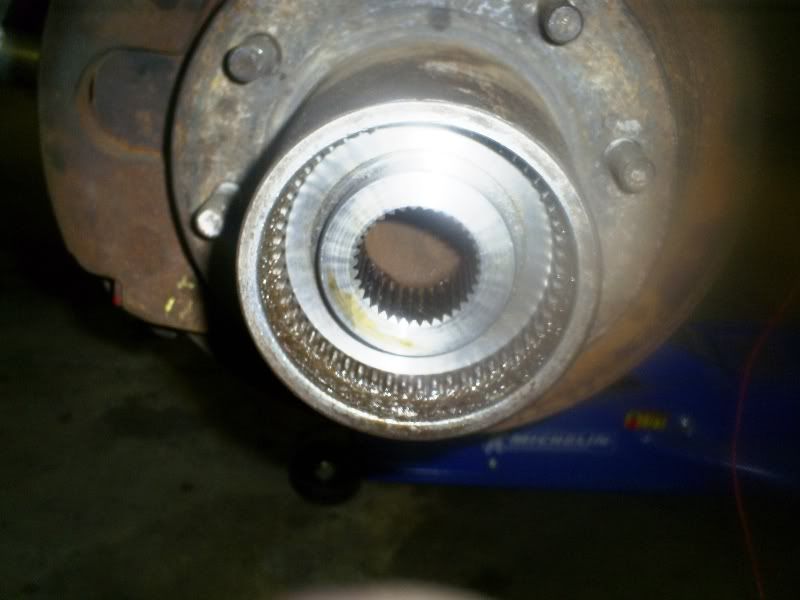 We tried to bleed the brakes and found that where the brake line bolted to the front caliper it was leaking, so we put in a new banjo bolt with a bigger shoulder and some new copper washers and tightened the crap out of it and it stopped leaking 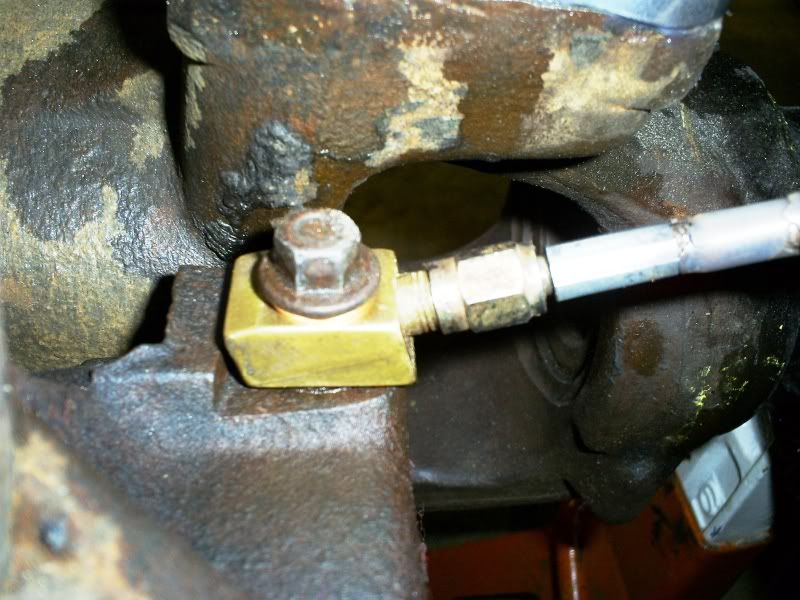 The next problem came when we tried to loosen the brake bleeder bolt and it wouldn't loosen. We welded a nut to it and the bolt broke off inside the caliper! So I'm having the guy doing my r&p install fix that for me too. The last step was finishing up the fuel injection install. Ryan was in charge of this one, I don't do wiring. Starting with a used kit definitely made this more challenging, but with a voltometer and a lot of patience, Ryan was able to get it all wired up. We tried using my old mechanical and electric fuel pump, but they put fuel into the injectors in spurts instead of a continuous spray. So they ran a new feed line with the supplied electric pump and a new fuel filter and also a new return line to the tank. Trust me that all of this sounds way easier than it was, but finally it was running as smooth as could be!! Here's the finished pics. 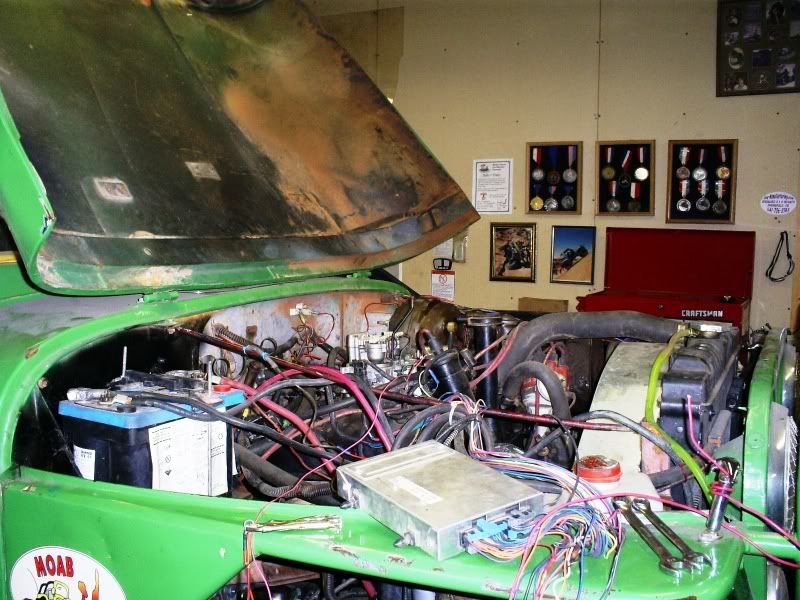 And all the wiring neat and organized, atleast as much as we could (After Safari, Ryan is going to clean up my wiring for me.). 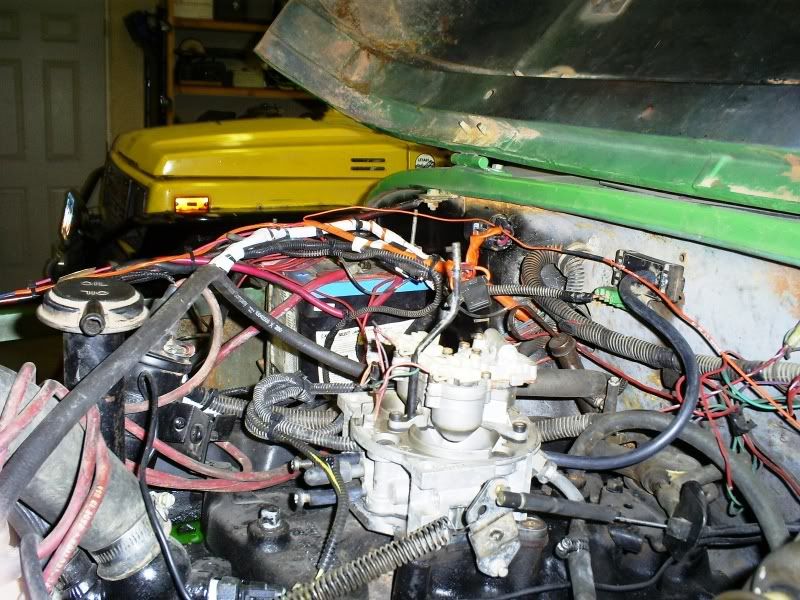 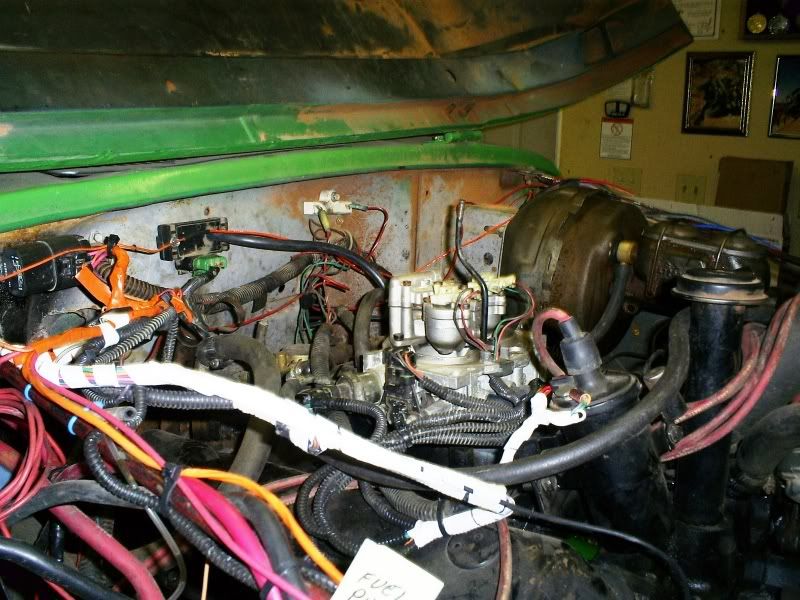 And finally ready to drive home!! 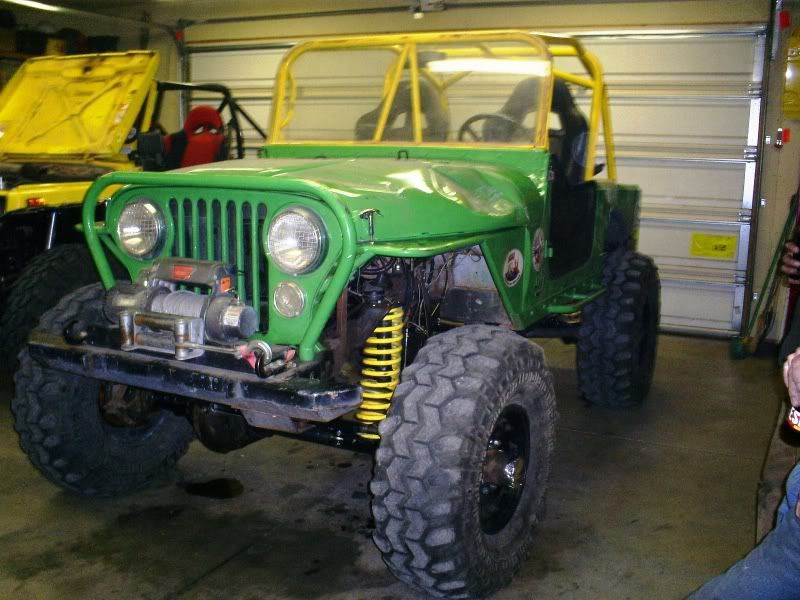 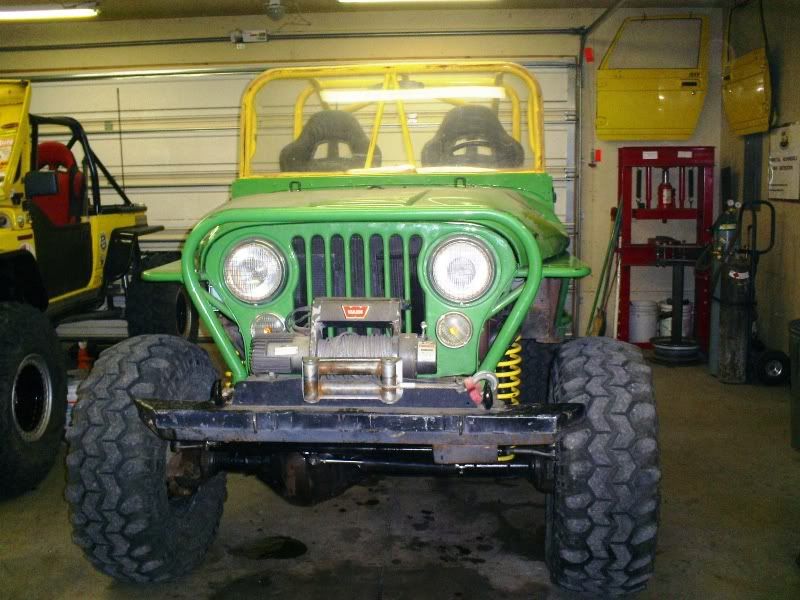 The ride home went great, the new injection system ran great, I had no death wobble, or any shimmying at all. I wasn't going very fast, probably no more than 35, but the tires seemed very smooth with their 8 psi; the airsoft pellets seem to do their job of balancing the tires as I drive. I'll verify this as I drive more at faster speeds. Other than a VERY soft brake pedal, no complaints. The next morning it took quite a bit of cranking before it started, but once it did, it ran great! I hope to pick it up this afternoon so I can test it before I lead a trail on Saturday. Wish me luck! |
|